|
3D Surface Plotter
1.0.0
Create 3D Surface Charts for Any Math Function
|


|
|
3D Surface Plotter
1.0.0
Create 3D Surface Charts for Any Math Function
|
|
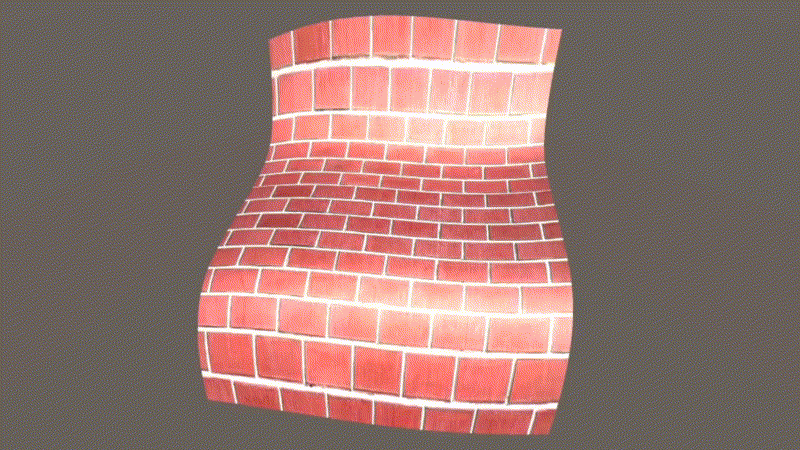
The SurfaceData.CreateData method in the Surface3DLib library also generates the UV coordinate data for a 3D surface. We can use this UV data to map a texture image onto a 3D surface plot. In this demo, we will explain how to add texture mapping to the built-in Peaks surface.
From the 3D Surface Plotter/Scenes folder, double-click on the scene called TexturePeaks to bring up the demo.
The 3D Peaks surface with the default brick texture image is displayed in the Scene view window. From the Hierarchy window, you can see that this scene contains only one GameObject named Surface. Click on the Surface to bring up the Inspector for it. From the Inspector, you can check the surface's properties. In this case, the material is specified using TextureMaterial. The surface is also attached to a C# script called TexturePeaks.cs, which exposes several properties that allow you to manipulate the surface plot and animation.
Let's examine the C# script file used in this demo. From the 3D Surface Plotter/Scripts folder, double-click on the TexturePeaks.cs file. Here is the code list for this file:
First, we introduce the Surface3DLib library using the statement:
We then define several public fields whose values can be modified in the Inspector. But these fields do not include colormap-related fields because in this demo, we want to use the texture mapping rather than the colormap to add colors to our 3D surface plots.
The key method to use the Surface3DLib library is the CreateSurface method. Inside this method, we first establish the relationships between the public fields defined in the Inspector and the fields implemented in the SurfaceData class in the Surface3DLib* library. Next, we call the MathFunc.PeaksAnimation method with the AnimationSpeed as its input argument to animate the parameters used in creating the built-in Peaks function inside our Surface3DLib library.
Next, we call the SurfaceData.CreateData method to create corresponding data, including Vertices, Colormaps, UVs, and Triangles (or Indices), for the 3D Peaks surface. This method accepts the math function, x and z data ranges as its input arguments. We then assign Vertices, UVs, and Triangles (or Indices) data to the Unity mesh object. Note that, we do not assign the Colors data to the mesh object because we don't use colormaps in this demo.
Finally, we call the mesh.RecalculateNormals method to calculate the normal vector data that will be used for lighting.
Now, let's start the Play mode by clicking the Play button. You will get the default Peaks surface with the brick texture.
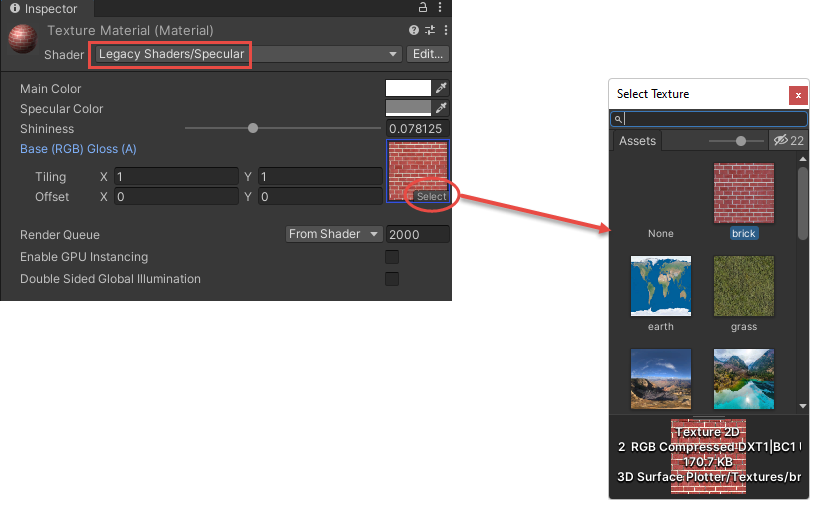
In the 3D Surface Plotter/Textures folder, we include several images that you can use to test the texture mapping on the 3D surfaces. Now, from the inspector, check the Is Animation box, the animation will start. During animation, you can also change the texture image. From the 3D Surface Plotter/Materials folder, click on the TextureMaterial to bring up its properties in the Inspector. This material use a legacy specular shader that allows you to select an image for the texture mapping, as shown in the following figure:
After selecting different images, you will get the results shown in the following figure: